Getting Started with a Simple Contour Rig
This tutorial will walk you through creating a simple Contour Rig Tools biped rig step-by-step. We’ll cover each Rig Tools feature in more depth later in the manual, but this should give you a taste of how easy it is to create flexible, high-performance character rigs with Rig Tools.
Putting down joints and bones
Start by loading up your character’s mesh and use the Contour Joint Tool to begin drawing joints. You enter this tool by selecting the Rig Tools ► Bones ► Contour Joint Tool menu item.
The Contour Joint Tool works a little bit like Maya’s Create Joint tool, but it creates Contour Joints instead of Maya joints, and has some additional functionality, allowing adjustment and insertion of joints while the tool is active.
To start laying down your character’s spine, hold control and click in the viewport to create a new Rig Tools joint chain right at the groin. Continue Control-clicking to add three more joints to the chain, one at the hips, one at the heart, and one at the base of the neck, as pictured. You can edit any of the joints at any time while drawing the chain by selecting the joint and moving it. After doing so, you can select the joint at the end of the chain and continue Control-clicking to add additional joints.
It’s often helpful to use Maya’s snap-to-mesh-center option when placing joints. Note that when the joint is created it will not snap to the center of the mesh, but moving it even a small amount will make it snap. Figure 1.
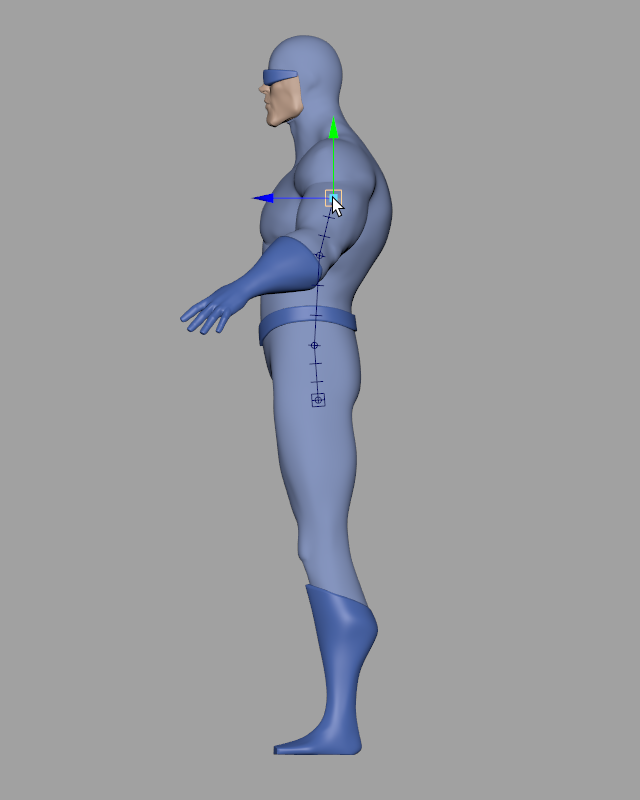
Figure 1
This arrangement of joints uses only one bone for almost the full length of the character’s torso, between the second and third joint of the chain. With Rig Tools that’s all we’ll need, as Rig Tools influences are splines, and we will be able to add “Bone CVs” to bend the spine later.
To rig the arms, we need to start a new joint chain. The Contour Joint Tool will automatically add to a selected chain, so to make a new chain make sure nothing is selected and Control-click at the clavicle to create the base of the chain. Now add four more joints, at the shoulder, the elbow, the wrist, and part way into the palm. Figure 2.
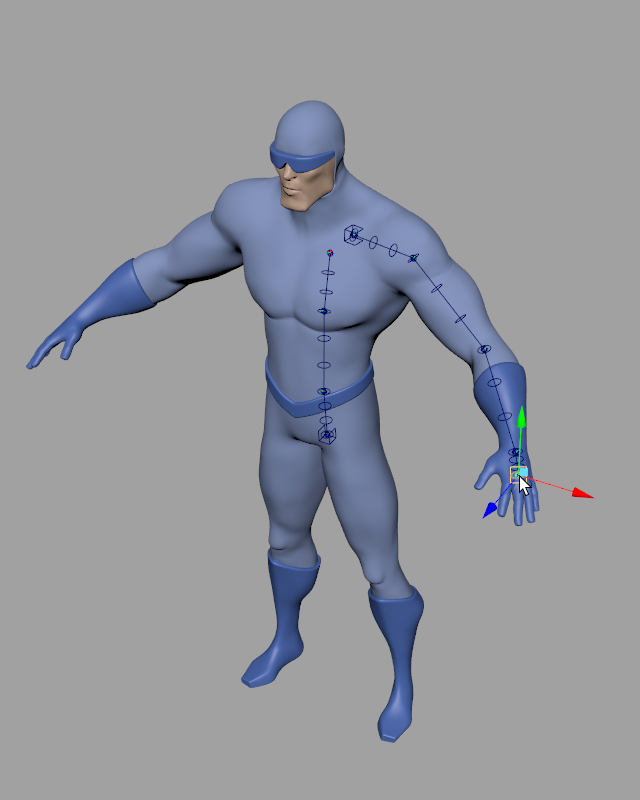
Figure 2
For the hips, we’ll place our joints a bit differently than we would for a standard Maya rig. A Contour Joint Chain controls deformation along its full length, and we want to be able to use the nice deformation that comes with that on the hip area itself. We will start our leg chain a bit above the hips, then place joints for the hips, knee, and ankle. This “overshoot” of the joint chain is something you will use frequently in Contour Chains to ensure good control over the shape of the chain through a joint and also the shape of the deformation where two chains overlap.
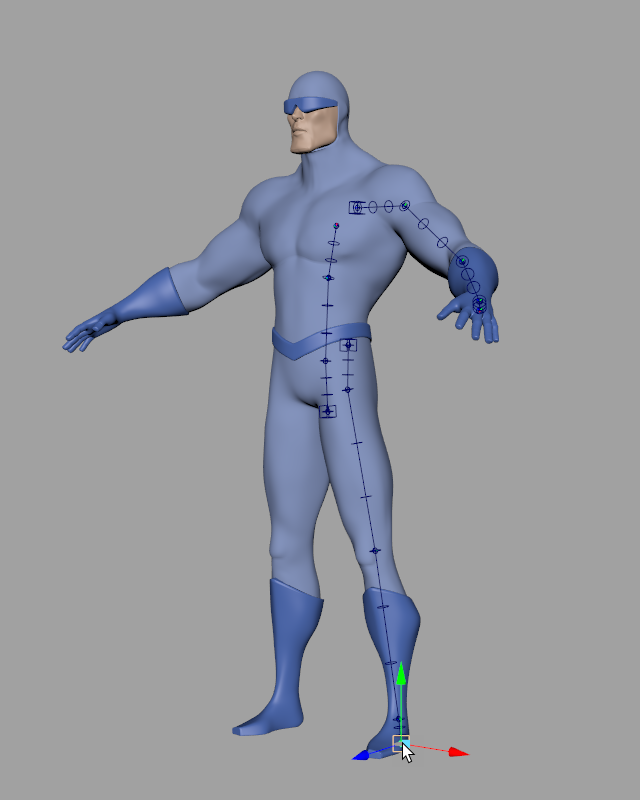
Figure 3
The ankle provides another example of this. While a Contour Joint Chain can bind to the mesh in almost any shape, when the underlying mesh has a sharp corner or 90 degree angle it’s best to use two different chains. For the ankle, we’ll add an additional joint to the leg chain, just below the foot, to ensure that the leg’s deformation continues straight through to the bottom of the foot. Then we’ll deselect the leg chain and start a new one—one joint at the ankle, one at the ball of the foot, and one at the tip of the toe.
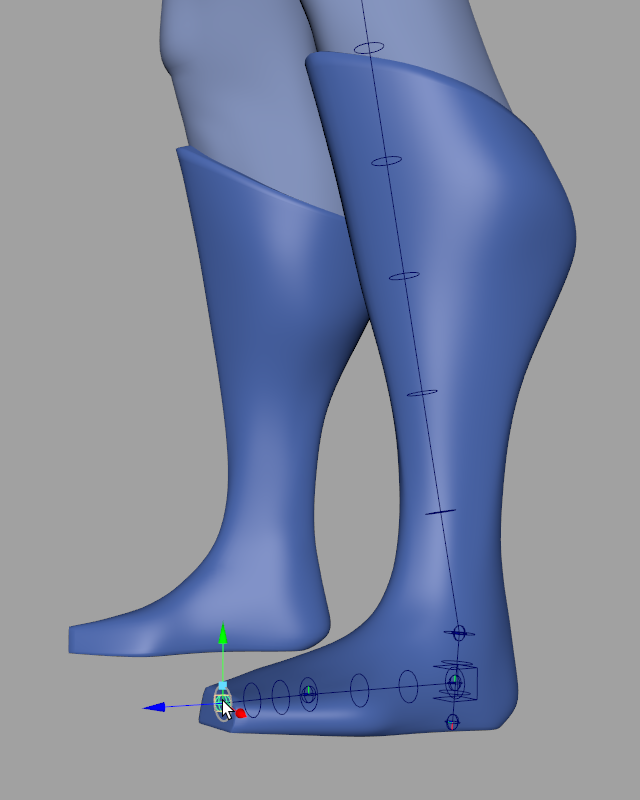
Figure 4
Let’s do a little organization. We can attach the arm to the torso by re-parenting it. Select the box at the base of the arm chain (it’s called a joint socket–—more on that later) and parent it to the chest joint. Figure 5. Do the same with the foot chain, parenting it to the last joint in the leg chain. Figure 6.
Don’t parent the hips yet though—–we’re going to do something different with them.
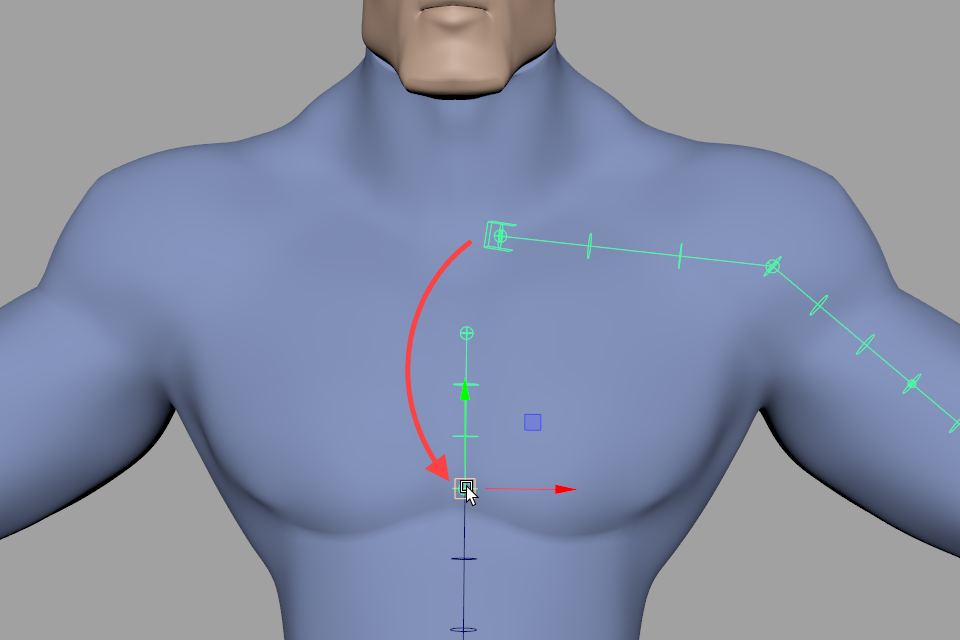
Figure 5
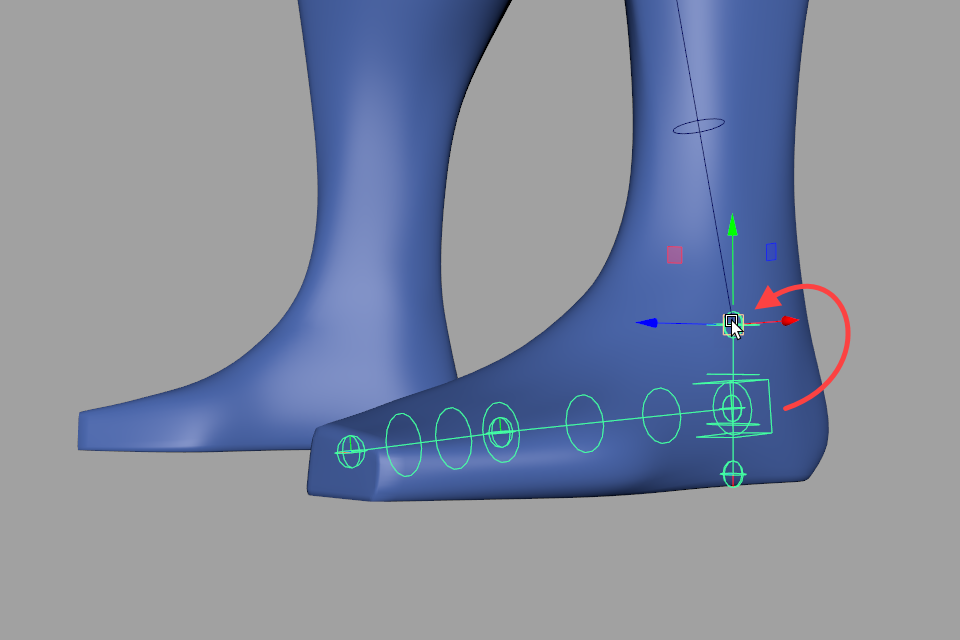
Figure 6
We can also re-name the nodes of a joint chain easily by selecting the chain’s joint socket and choosing Rig Tools ► Bones ► Rename Joint Chain from the menu. You’ll be prompted for a prefix, and after confirming the prefix all of the nodes in the chain will be re-named so that they begin with that prefix, and follow the standard namning convention for a Contour joint chain. Note that if you have already manually re-named any of the nodes in the chain, your changes will be lost. Figure 7.
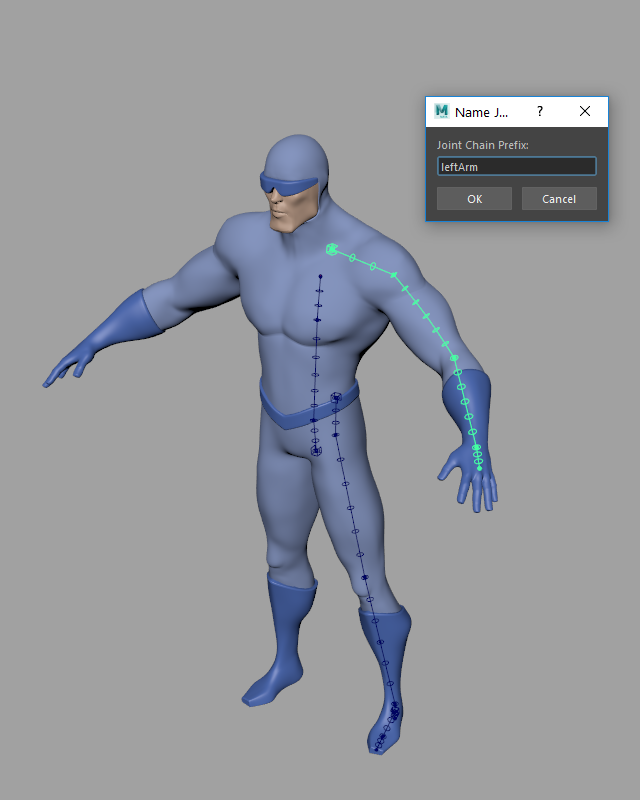
Figure 7
To mirror a Contour Joint Chain, select the socket(s) you want to mirror and choose Rig Tools ► Bones ► Mirror Joint Chain. Mirror the arm chain and the leg chain. The foot chain will automatically be mirrored, since it is parented to the leg chain. Figure 8.
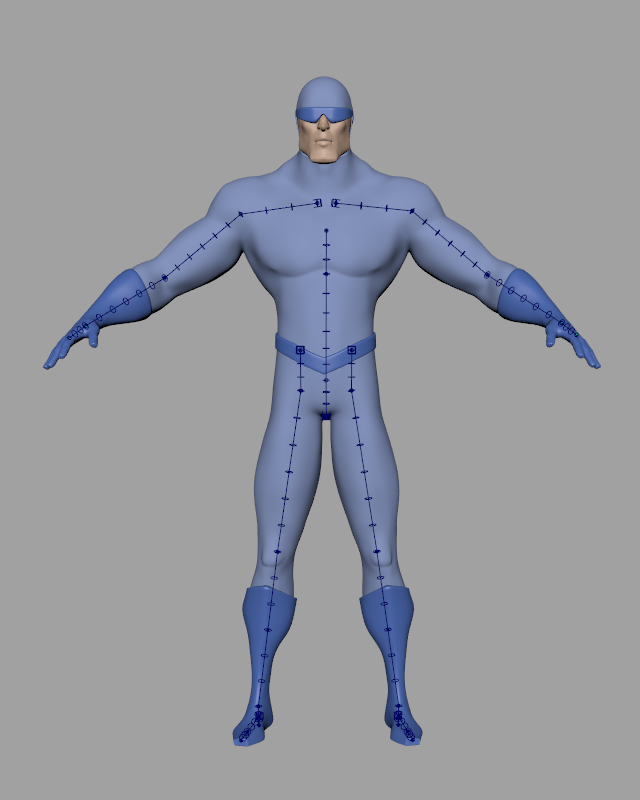
Figure 8
Once you’ve done that, we can attach the hips, but we’re not going to parent the socket as we did for the arms. The joint socket will need to be given different behavior from the hip joints, so instead we’re going to parent the hip joints themselves to the spine. Even though the nodes of a joint chain are created in a defualt hierarchy, onw that will often be desirable, they do not have to remain in any particular hierarchy. It’s perfectly OK to re-parent Contour Joints.
In this case we’ll want to group each joint before parenting, so that its rotation and translation remain zeroed out in its default position, and then parent it to the first spine joint. Figure 9.
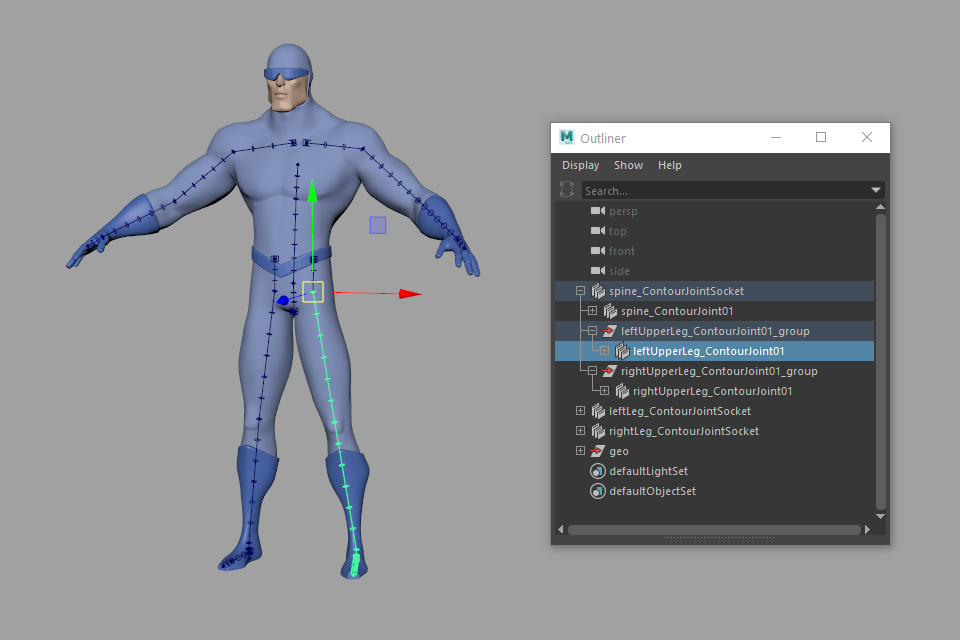
Figure 9
This will leave the sockets in world space, but that’s OK. We’ll be constraining them later.
Finally, we’ll add the head joint chain to complete the basic set of chains we’ll need for a bipedal character. We’ll be leaving out fingers for purposes of this tutorial. Figure 10.
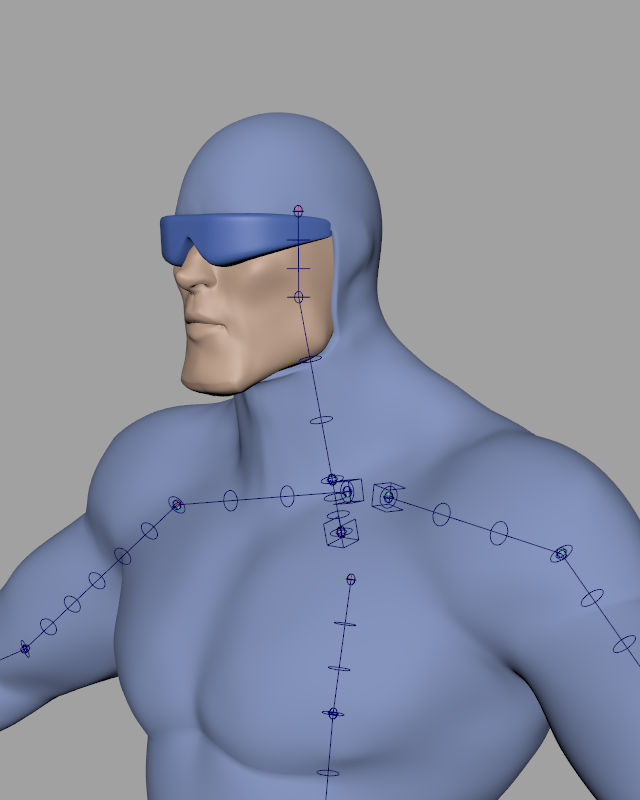
Figure 10
Binding The Mesh
Now the mesh needs to be bound to our joint chains. Unlike Maya joint chains, each Contour joint chain is a single influence. This means our character will only have eight influences at the start (a spine, a head, two arms, two legs, and two feet). This greatly simplifies things, but we need to do a little tweaking before we bind, to ensure that each of these influences deforms the character as nicely as possible.
You may have noticed some rings around the bones of our joint chain. These rings are a visual indicator of the radius of the joint chain. The radius affects how the Contour Deformer will deform the vertices of the mesh. For now we just need to set the radius of each joint chain to more or less the average radius of the geometry it deforms. Great precision is not necessary here—–most radius values that roughly fit the mesh will give good results.
To adjust a joint chain’s radius, select its joint socket and adjust the Radius attribute in the channel box until the indicator rings roughly match the geometry they’ll be deforming. Figure 11.
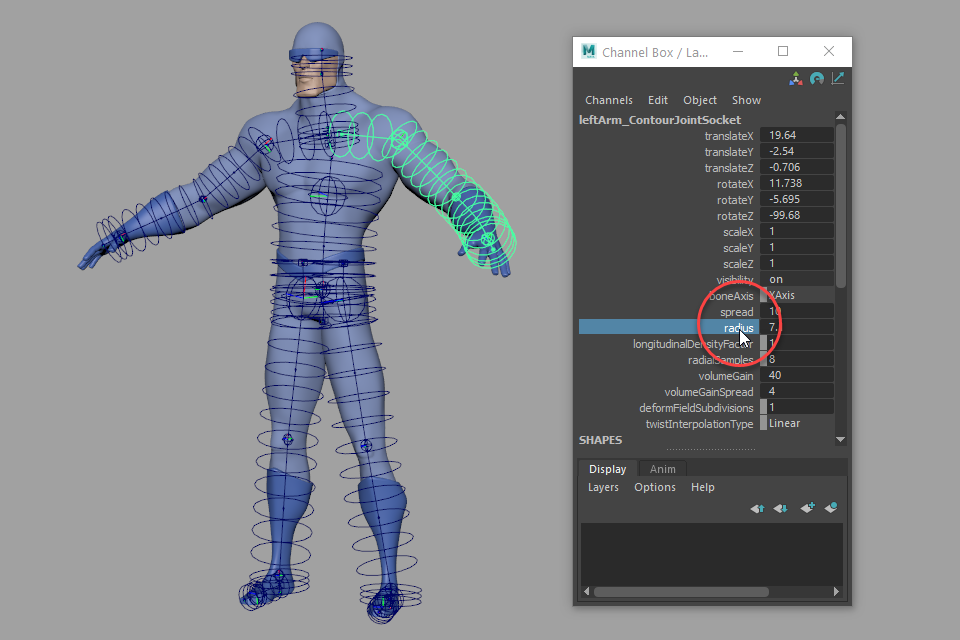
Figure 11
Once this looks right you can turn off visibility of the rings using Rig Tools ► Bones ► Disable Radius Indicator For All Bones, since the indicator rings can clutter your view of the scene.
Now things are ready for binding. To bind to the mesh, select all of the Contour Joint Sockets and the mesh geometry, and choose Rig Tools ► Deform ► Bind Mesh to Influences. You select the joint sockets, rather than the joints, because joint sockets are how you refer to an entire joint chain, and the joint chain (rather then any individual joint) is the influence we’re applying to our mesh. Note that you have to select all the joint sockets you want to bind, regardless of parenting—–you must select both the leg and foot sockets explicitly, for example.
Once bound, the deformation in the limbs should work very well already! You can adjust the softness of each joint’s deformation by adjusting its radius (which is different from the radius of the joint chain as a whole). Figure 12.
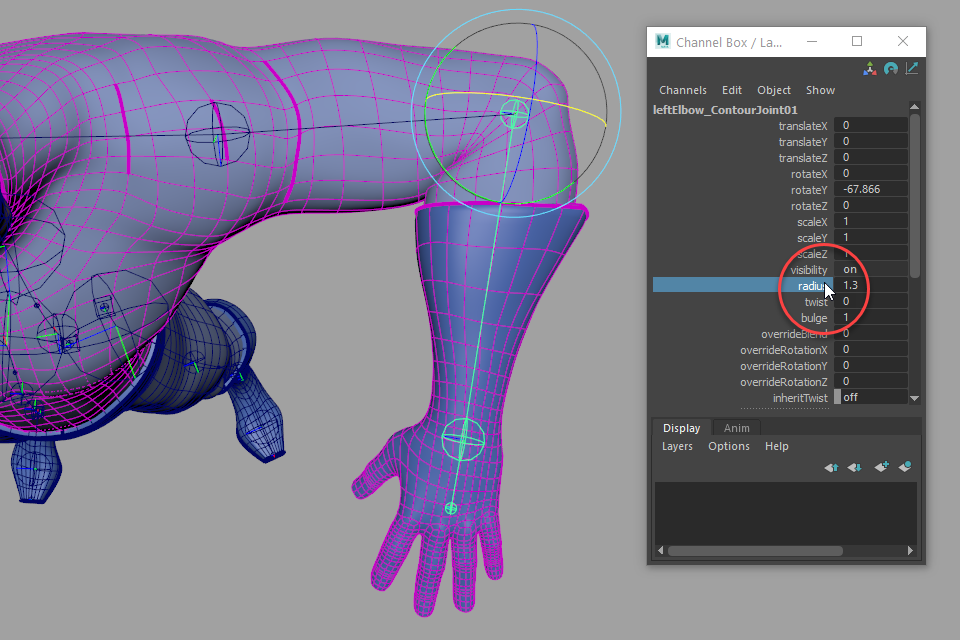
Figure 12
Where the joint chains overlap, however, we will have to paint some weights. Weight painting in Contour is much like normal Maya weight painting, but since there are far fewer influences there’s a lot less of it to do. Choose Rig Tools ► Deform ► Paint Weights and paint sensible transitions for the shoulders, hips, and ankles.
What a “sensible transition” is may be a little different from what you’re used to. In traditional Maya rigs, areas that will bend a lot in animation are normally where you would paint in transitions. In Contour rigs these areas are best left as much as possible to Contour’s automatic spline-based deformation. For instance, the deltoid area of the shoulder would be more or less solidly weighted to the arm chain, with the transition area in the trapezius and armpit areas. Figure 13.
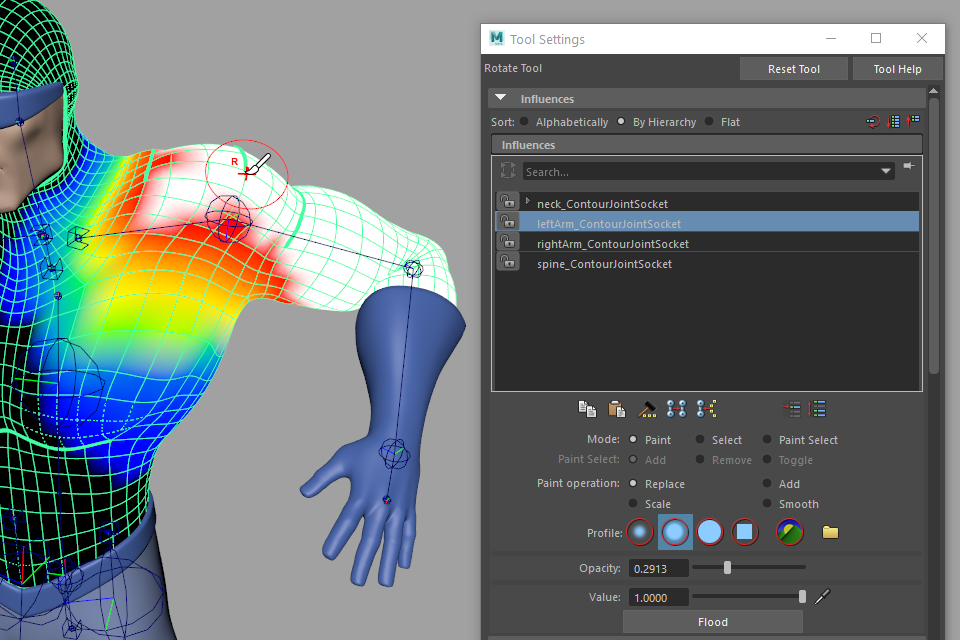
Figure 13
Contour deformation automatically propagates twist along joint chains to match the twist at each joint. Usually, this is exactly what you want, but in some cases you want to hold the twist in place. For instance, rotating the upper arm joint around the X axis will, by default, introduce twist in the shoulder area, which is likely to produce ugly deformation. Figure 14.
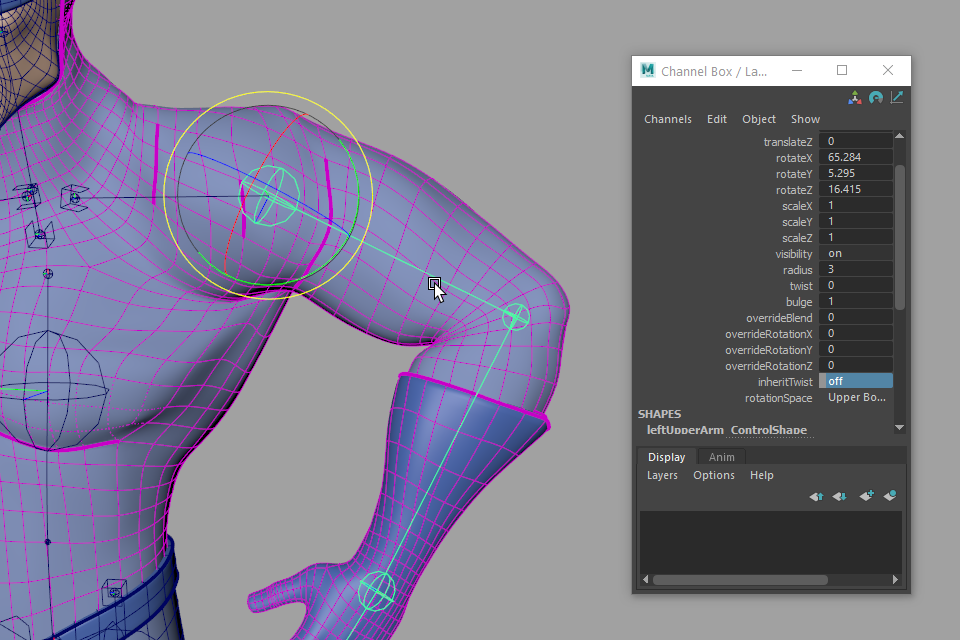
Figure 14
Turning on Inherit Twist for the shoulder or hip joint will tell it to maintain the twist of the previous joint in the chain, and produce perfect twist for a shoulder or hip joint. Figure 15.
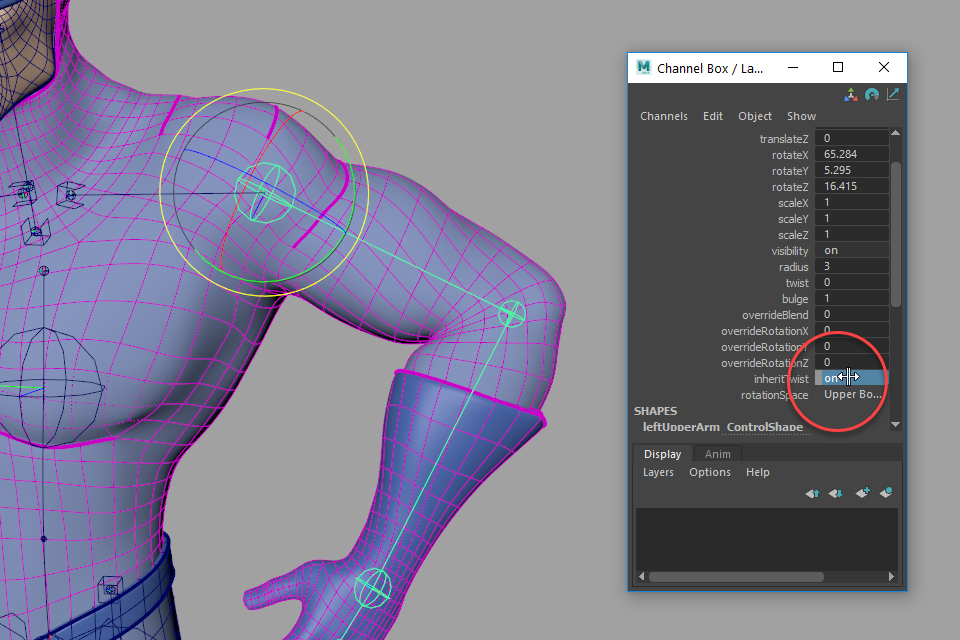
Figure 15
The next thing we need to address is deformation that weight painting alone can’t solve, in this case in the character’s head. Unlike the rest of the body, we don’t want spline deformation in the head, as this will distort the nose—–we want to deform the head rigidly. Figure 16.
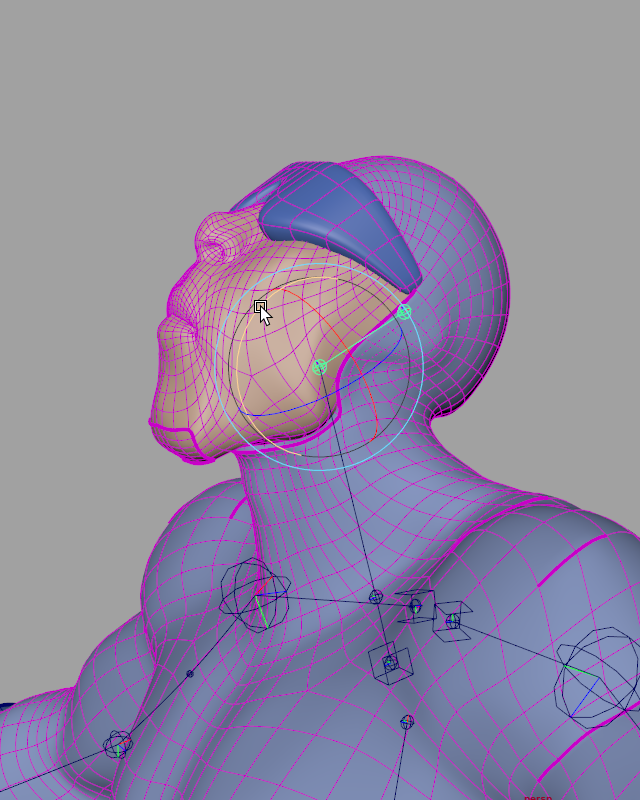
Figure 16
To fix this, you can add a rigid influence to the Contour Deformer. Rigid influences work just like standard Maya smooth skin influences, rather than Contour’s spline influences. You can add almost any transform as an influence. Let’s use a locator here. Parent the locator to the head joint, select it and the character mesh, and choose Rig Tools ► Deform ► Add Influence. Now paint weights for the head influence to appropriately cover the head areas you want to remain rigid. Figure 17.
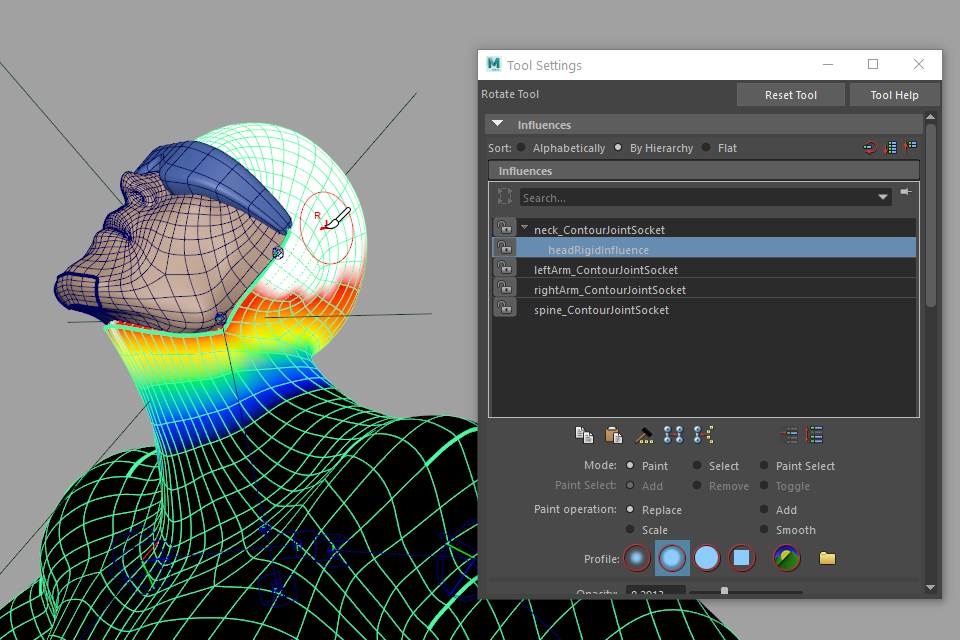
Figure 17
As you work you can mirror weights using the Rig Tools ► Deform ► Mirror Weights menu item. Remember to return the character to its default pose before mirroring, just as you would with Maya’s mirror weights tool. Since each Rig Tools Joint is “zeroed out” in its default position, you can do this by simply setting the translation and rotation values of every joint to 0.
You can also adjust the position of the influences non-destructively at any time. Simply choose Rig Tools ► Deform ► Rebind Mode ► Enter Rebind Mode. The mesh will turn dark red, snapping to its original shape, and any Contour transforms can be re-positioned.
In most cases, you should use the Contour Joint Tool to re-position Contour Joints. One of the functions of a Contour Bone is that it “buffers” a Contour Joint, meaning that the joint’s transformation values start at zero wherever it was placed with the draw joint tool. Using the Maya tools to move a joint will re-position it, but it will also drag or rotate the joint away from its buffer, causing non-zero transform values in the rest pose. Using the Contour Joint Tool to move a joint will change the orientation of the previous joint in the chain and the bone’s length instead, keeping the bone chain aligned in its rest position, with all Contour Joints properly buffered. There are some circumstances in which you may want to parent a Contour Joint to something other then a Contour Bone (we have just done so for the hips, for instance) but in general we recommend keeping the chain intact, as being able to return the character to its rest pose by zeroing out translate and rotate values is often useful.
When you’re satisfied with your changes, choose Rig Tools ► Deform ► Rebind Mode ► Leave Rebind Mode.
Control Rigging
Now it’s time to add some controls to the rig.
The first step is to give the spine the ability to bend. We used just one bone for almost the entire length of the spine, because Contour Bones are flexible. We can add Contour Bone CVs to our bones to give us control over the shape of the spline between two Contour Joints. To add a bone CV, select the joint at the base of the spine and choose Rig Tools ► Bones ► Add Bone CV. A new bone CV will appear at the halfway point of the bone. You can add as many bone CVs as you want, but in this case one will be sufficient to create nice clean arcs between the joints of the spine. Figure 18.
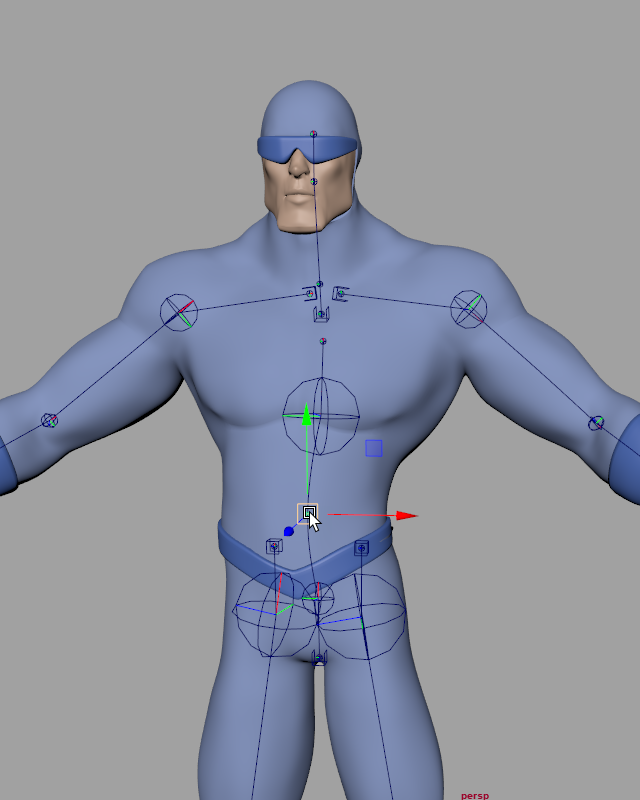
Figure 18
Now that the spine has a bone CV, there is a small issue. Translating the top joint of the spine leaves the bone CV in place, which isn’t what we want. Figure 19.
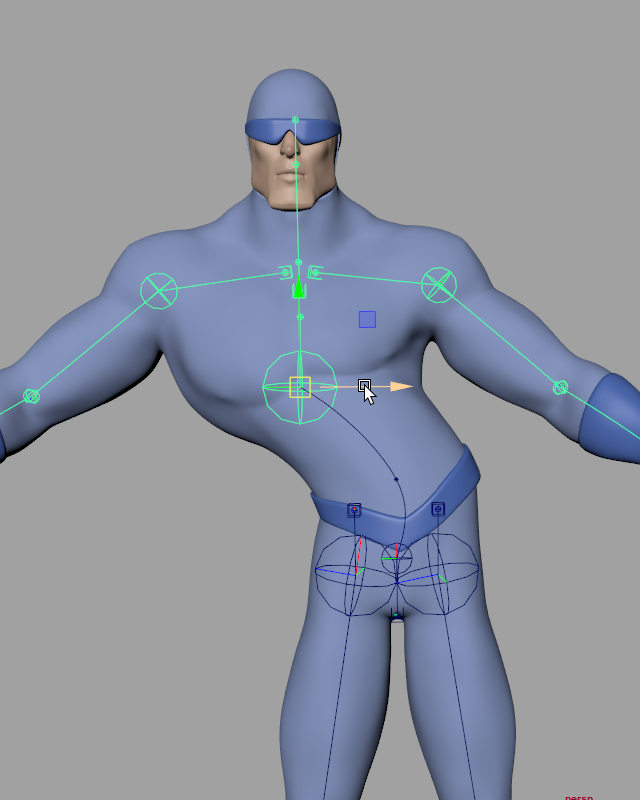
Figure 19
To create “spline IK”-like behavior for our spine, we’ll need to create an aim handle. Create Rig Tools Aim Handles is an all-in-one command that creates a target, constrains the rotation of the appropriate parts of the joint chain, and sets up the bone so that it will adjust its length to match its target. Select the top torso joint and choose Rig Tools ► Tools ► Create Rig Tools Aim Handles. A locator will be created, which can be used directly or parented under a control curve.
The aim target will make the spine rotate from the bottom, but it won’t control the rotation of the joint at the top of the spine. For that we’ll select our aim handle and the joint at the top of the spine, and choose Rig Tools ► Tools ► Create Rig Tools Orient. Now the handle will fully drive the top of the spine. Figure 20.
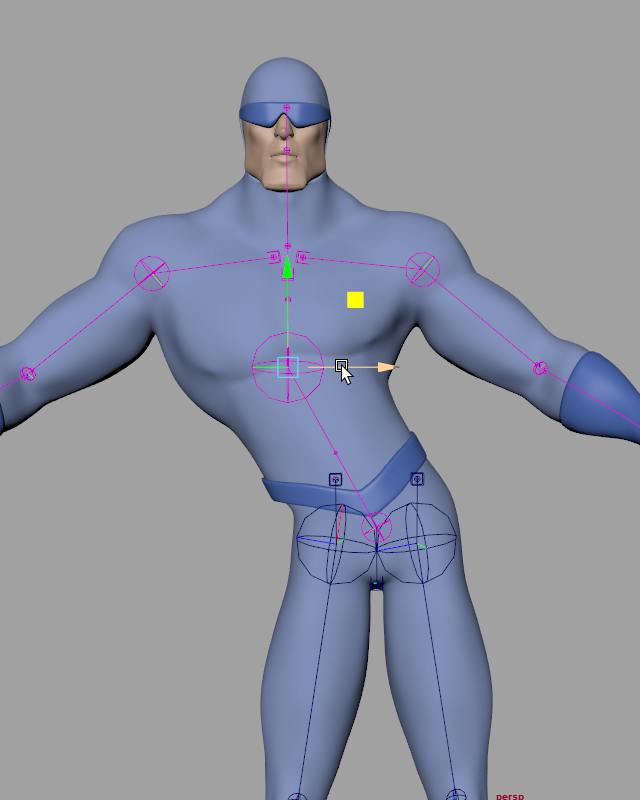
Figure 20
When we placed the joint chain for the legs, we talked a little bit about overshoot. Overshoot creates nice deformation here, but leaves us with an extra joint hovering above the hip. When we move the spine bone CV, the leg joints in the middle of the torso won’t follow along with it, making odd lumpy love handles show up in some positions. Figure 21.
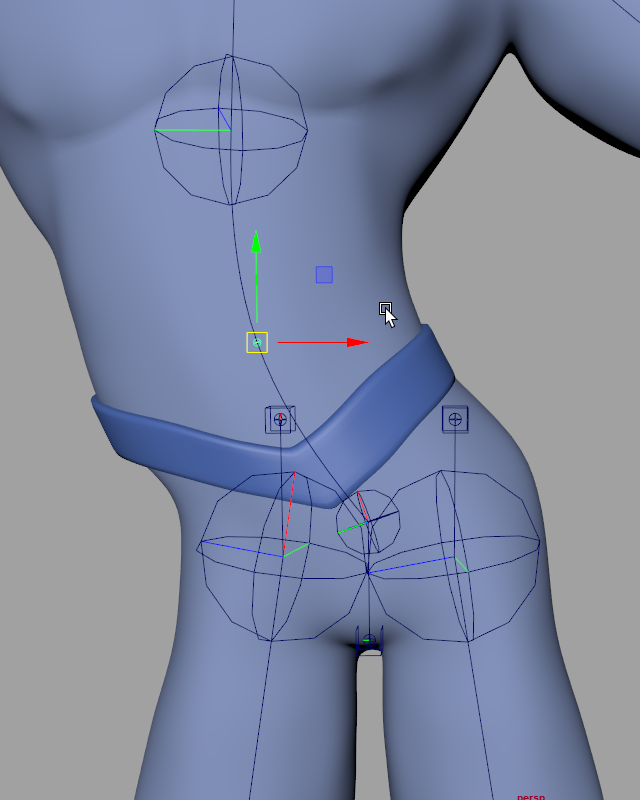
Figure 21
We’d like the extra joint to follow the same arc that the mesh is following. We can do this with a Contour Deform Field Constraint. Deform field constraints “constrain” the position and rotation of a transform using the same deform field that is deforming the mesh. Deform field constraints have a wide range of uses, but for now we’ll just use one to solve our hip issues. Select the joint socket at the base of the spine and the leg’s joint socket, and choose Rig Tools ► Tools ► Create Contour Constraint. Figure 22.
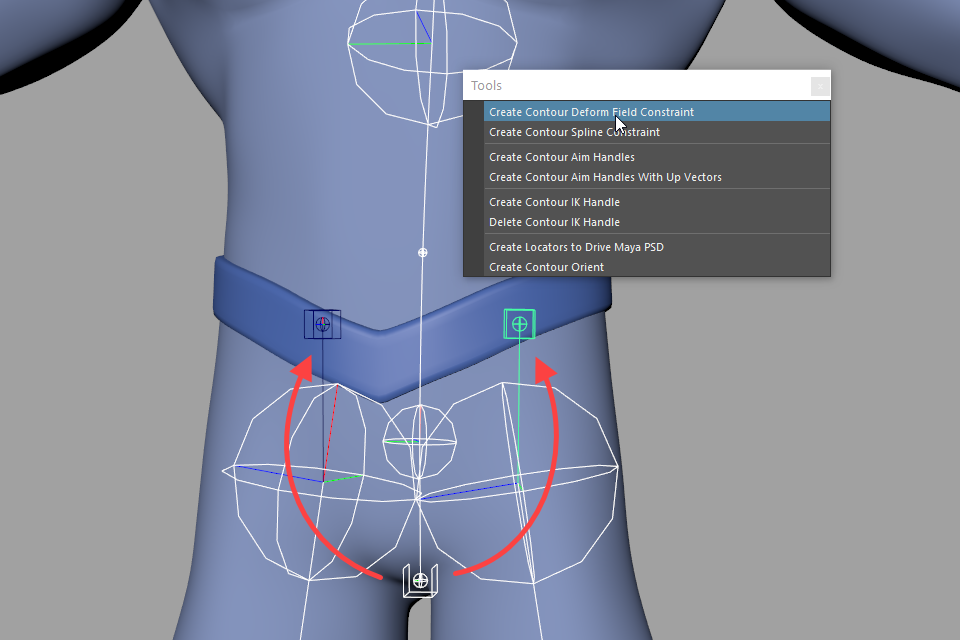
Figure 22
Now the hip joint is driven by the Contour spline and will behave nicely. Figure 23.
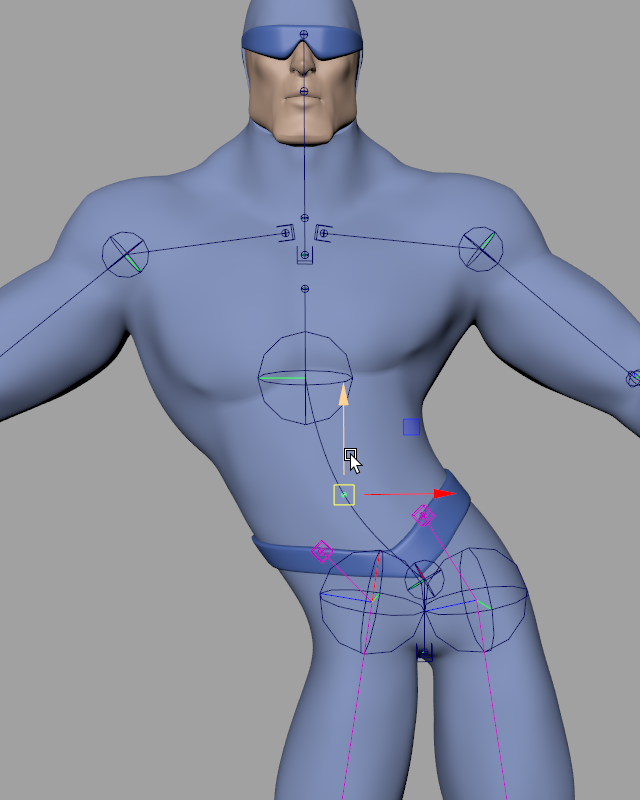
Figure 23
Because the joint chain begins within the body, and its first joint follows along with the deformation of the spine, we’ll get the same high quality deformation at the hip joint that we’ve seen in other areas of the body such as the elbow and shoulder. As with the shoulder, we’ll get the best results by weighting the most bendable areas very closely to the leg chain, and using weights to control how the effects of both leg chains blend at the crotch. Figure 24.
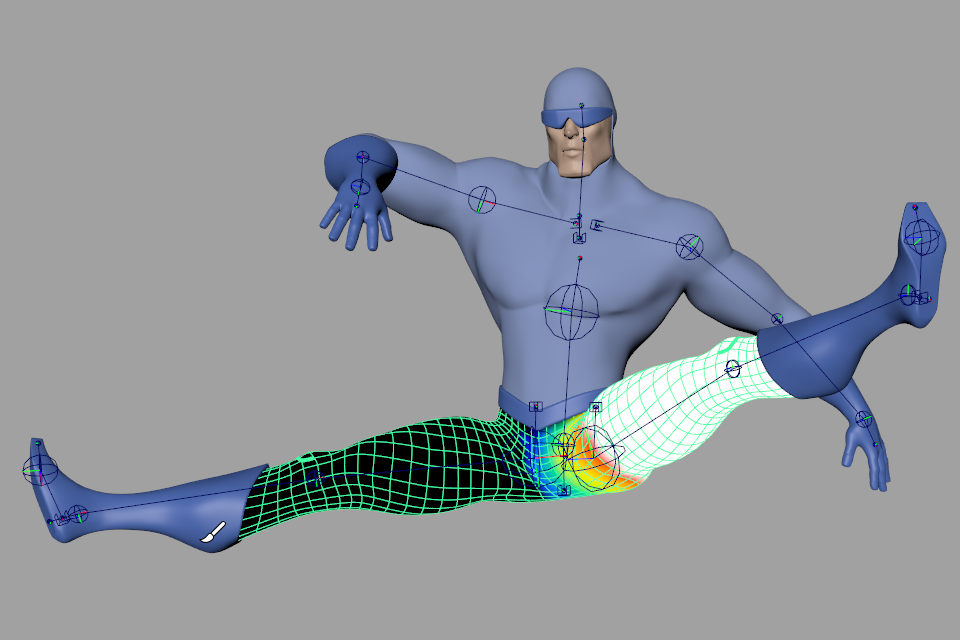
Figure 24
Contour comes with its own IK handle. Let’s add IK handles to the arms and legs. To add an IK handle, select three Contour Joints in the same chain in order, and choose Rig Tools ► Tools ► Create Contour IK Handle. A new IK handle and pole vector will be created.
The IK handle behaves much like a Maya IK handle, but it automatically controls the orient of the target joint, and has built-in stretchy behavior. The IK handle’s pole vector can be parented under the handle or controlled separately, as desired. Figure 25.
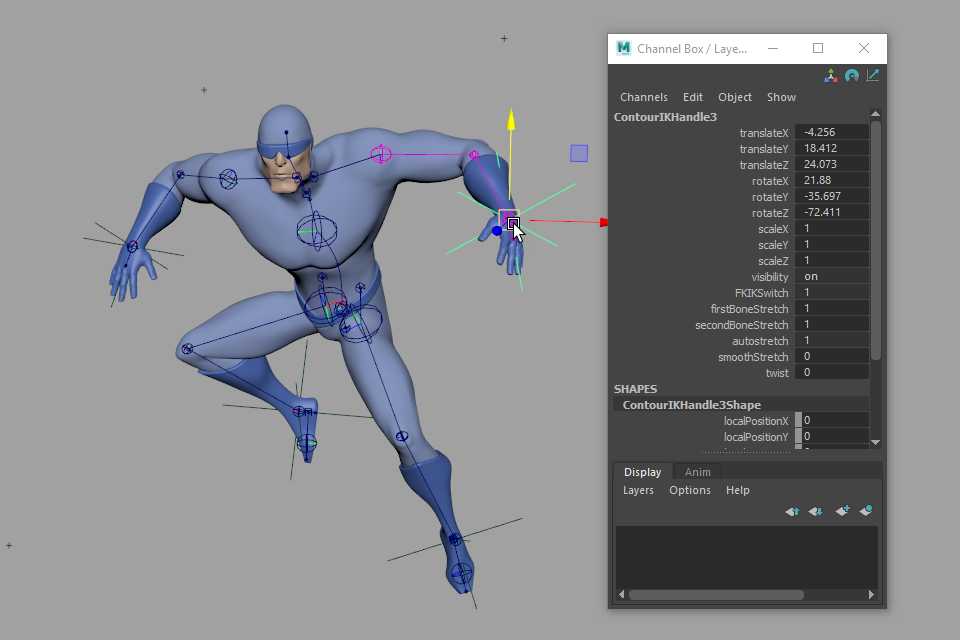
Figure 25
Contour’s aim and IK handles hook into the rotation and length override attributes on Contour Joints and Bones. This makes it very easy to blend back to FK when needed without adding additional rigging. You can, for instance, blend from IK to FK using the “blend” attribute present on the IK handles. The FK controls are simply the joints themselves—–no extra hierarchies needed! Figure 26.
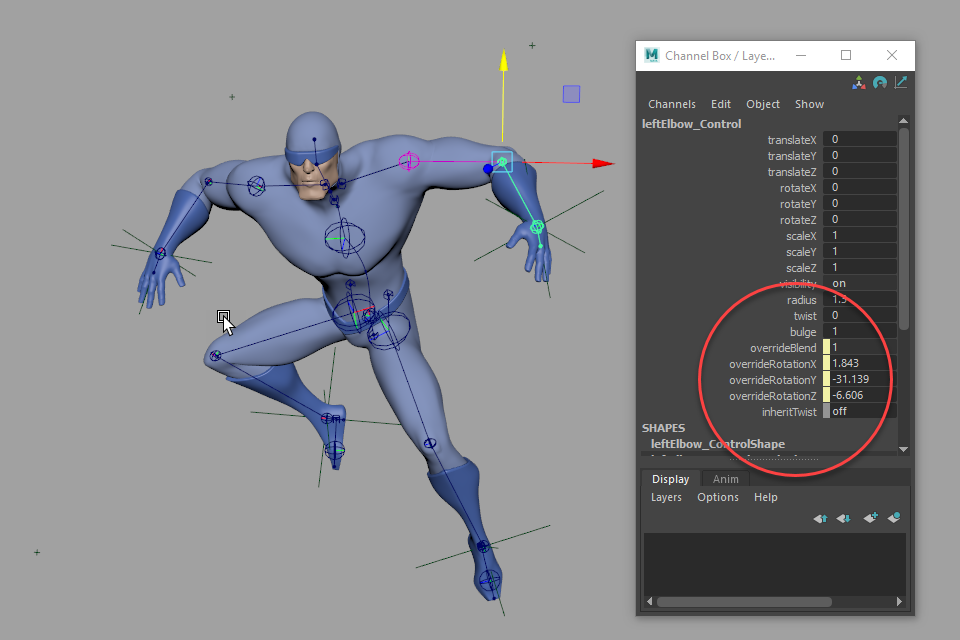
Figure 26
The arms and legs could use some extra control. We can add bone CVs to allow bending between the joints, just as we did for the spine. Figures 27 and 28.
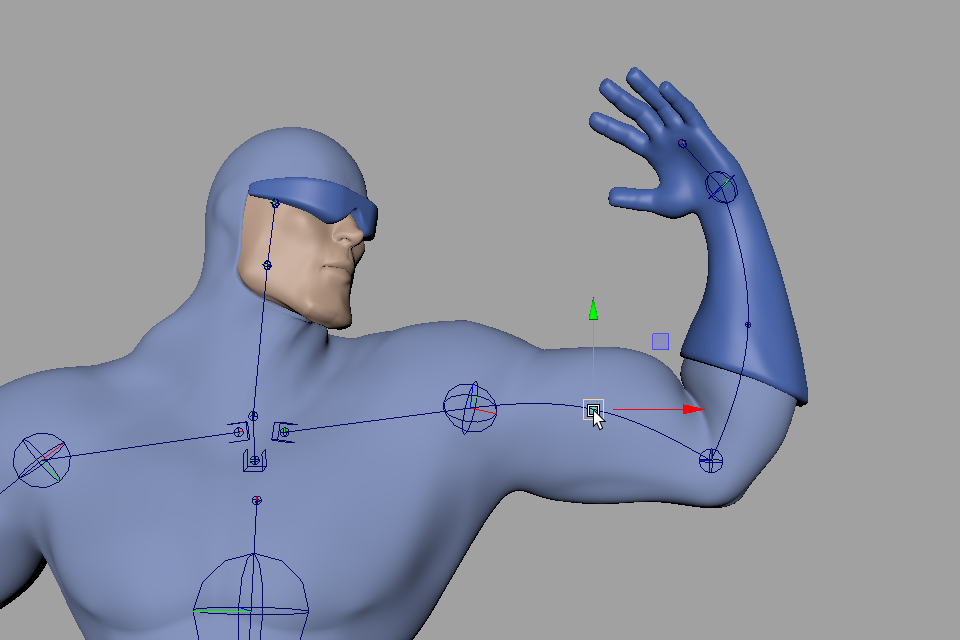
Figure 27
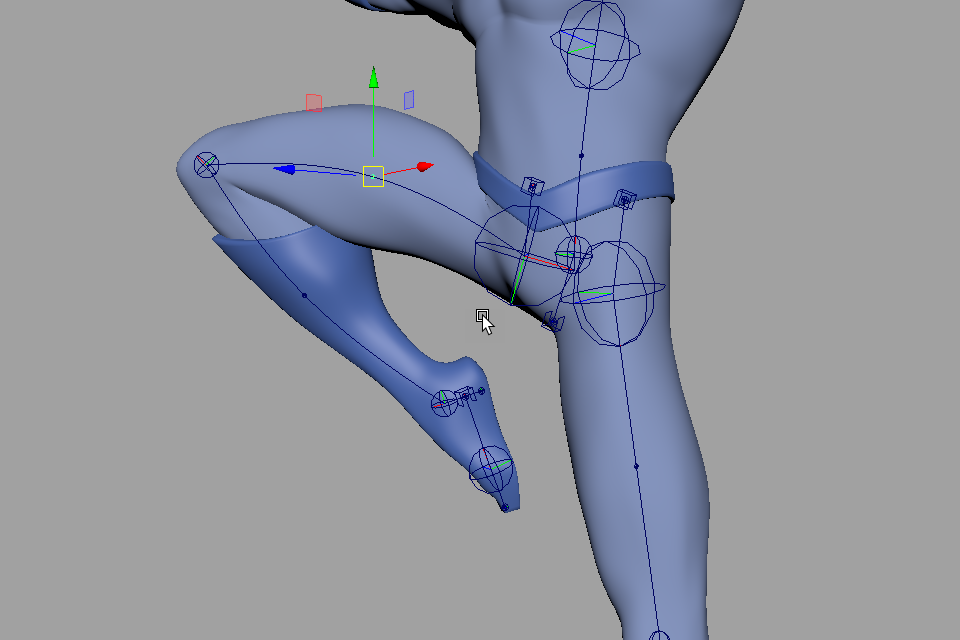
Figure 28
The final step in creating our rig is to add some control shapes. The Contour Joints and handles can be animated directly, but adding a few NURBS curves lets you customize the size and shape of your selection handles, and gives you the option of removing the Contour shape nodes. The simplest way to do this is select a handle or joint and use the Rig Tools ► Bones ► Add Circle Shape menu item. This creates a new shape under a handle or joint, and makes all the attributes of the handle or joint available when the control is selected. You can edit these shapes by adjusting their control points, as you would with any other NURBS curve.
Once we’ve added a shape to every handle, joint, or bone CV we intend the animator to use as a control, we can remove the Contour shape nodes for a cleaner-looking rig using Rig Tools ► Tools ► Delete All Contour Shape Nodes. This also improves the rig’s performance, as Contour shape nodes can slow down Viewport 2.0 drawing. But don’t worry—if we need to modify the rig we can always bring them back using Rig Tools ► Tools ► Restore All Contour Shape Nodes. Figure 29.
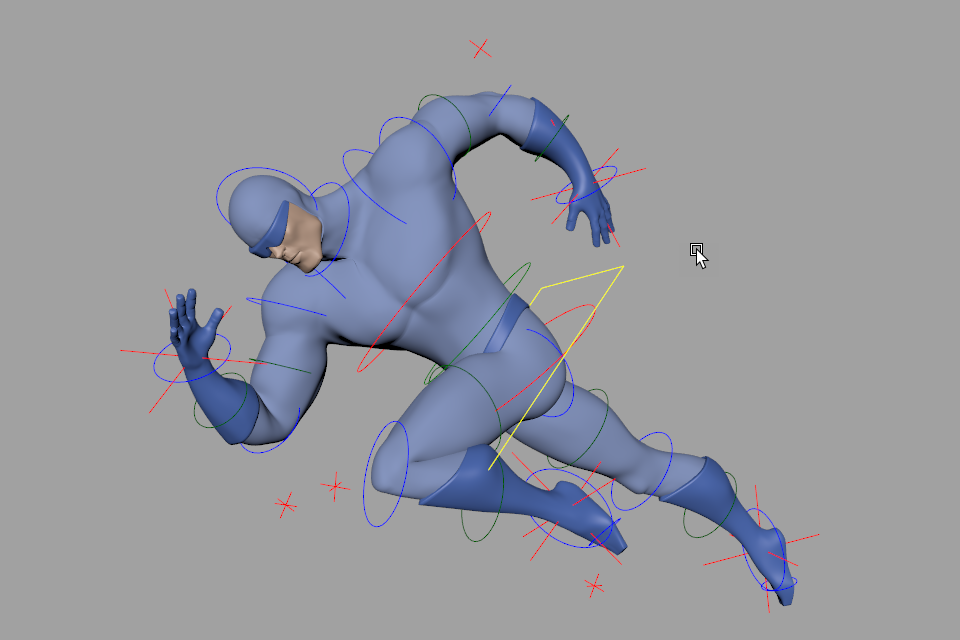
Figure 29
That’s it—–we now have a complete, usable rig! And though we didn’t do anything beyond the basics—–adding joints, painting some simple weights, and adding some aim/IK handles—–our rig has features you’d normally only see in complex, feature-level rigs built using an advanced auto-rigging system with a lot of effort put into deformation. Adding additional features like foot-roll and space-switching is beyond the scope of this tutorial, but it’s relatively easy to build them onto such a simple, flexible base. With Rig Tools, building rigs by hand becomes a possibility again, and auto-rigging can be radically simplified.