Techniques
Overshoot
Rig Tools’ spline-based deformation is driven by changes in the spline in the neighborhood of the point on the spline a vertex to be deformed is bound to. As a result, vertices bound to the very end of a Rig Tols spline do not gain the full benefits of Rig Tools deformation, and behave very much as if they were deformed by a normal Maya skin cluster and weighted entirely to a single influence at the very end of the spline.
Because of this, it is very common to extend Rig Tools joint chains past the point at which a Maya joint chain would stop, adding an extra joint, in order to bind vertices past that point to the interior of a spline, and create a sufficient “neighborhood” around their bind positions to provide control over their deformation. We call this “overshoot”, and it is a very useful technique for areas like hips, wrists, and ankles.
For example, in a simple Maya leg there might be three joints, one each at the hip, knee, and foot—for simplicity’s sake, we’ll ignore the toe for now. The hip joint is placed inside the body at the desired pivot, and its influence is weight painted to blend with the rest of the body. Figure 1
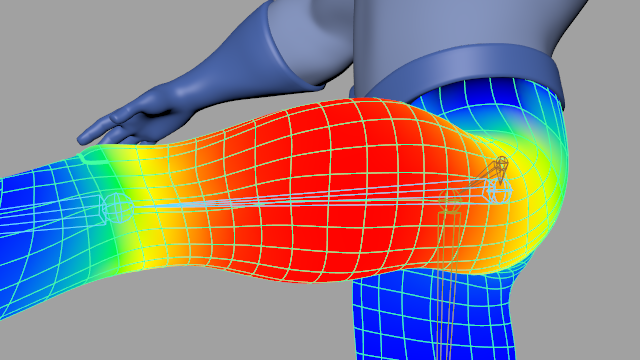
Figure 1
Creating weights that look good for a hip is difficult, and the Rig Tools deformer can do better, but it requires an extra joint to do so.
Because vertices bound to the end of a spline deform rigidly, if we were to start our chain where the hip joint would be in the Maya chain there would be nice Rig Tools deformation heading away from the first joint, but none passing through it. To ensure we have Rig Tools deformation at and around our hip, as well as deformation controls like joint radius, we need to start our chain with another joint, above the hip. With the hip joint in the interior of the chain, the vertices around it will all get nice Rig Tools deformation. Figure 2
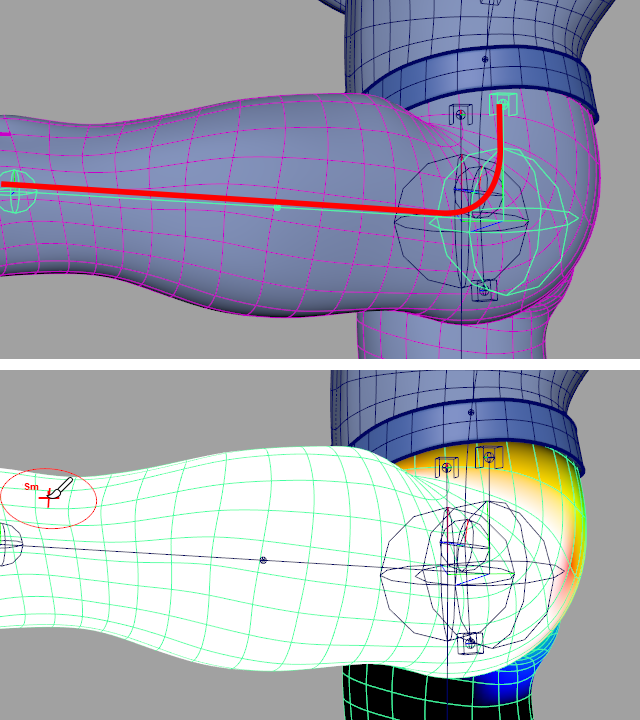
Figure 2
Of course, the hip overshoot joint also affects the shape of the spline, and the effect of the leg’s joint chain will have to be blended into that of the spine’s joint chain in the area above the hip. The easiest way to do this is to use a deform field constraint to constrain the overshoot joint to the spine. The deform field constraint constrains a transform so that it behaves as if it were deformed by the joint chain it is contrained to. With the hip overshoot joint constrained to the spine, you can start painting away the influence of the leg chain between the hip and the hip overshoot joint. Since the hip overshoot joint is moving with the spine, you are painting between two influences that are doing very similar things, which makes the blended region seamless. Figure 3
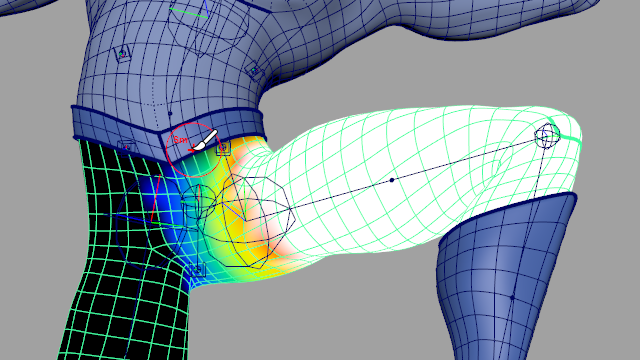
Figure 3
Overshoot is also useful at the end of a joint chain. In a simple Maya leg chain, the foot joint is an influence, and rotating it would deform the geometry of the foot. Rotating the last joint of a Rig Tools Chain does not rotate the geometry beyond it, because it is the spline that is actually driving the deformation, and the shape of the spline is determeined by the position of its control points—the Joints and Bone CVs in its joint chain. A spline’s control points do not have an orientation. Figure 4
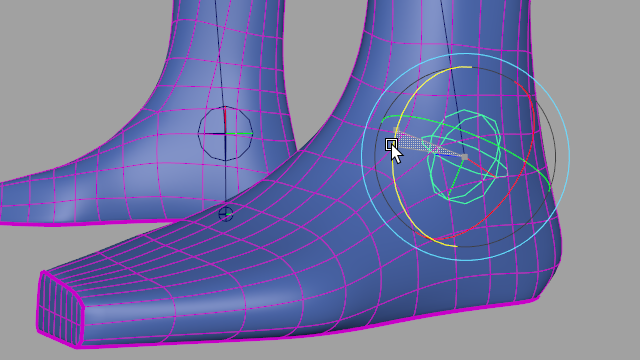
Figure 4
To make rotating the last joint of the chain behave as we would like, an additional joint must be added to the end of the chain. Figure 5
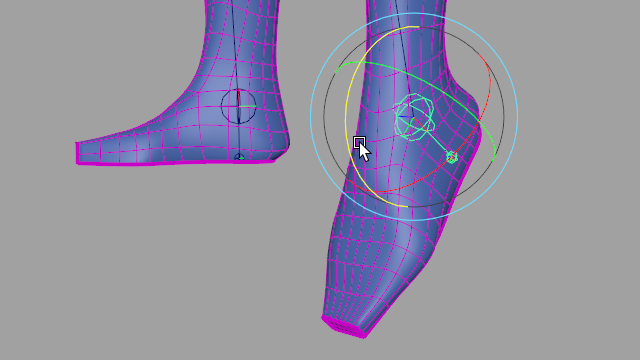
Figure 5
Deeciding how far from your main joints to place your overshoot joints can require some experimentation. We have found that a good rule of thumb is to consider where you want the mesh spread to stop—for instance, in the case of a wrist you generally want the palm to become rigid by the time the fingers start. Placing the overshoot joint very close to the joint it overshoots from can sometimes produce undesirable deformation, as the Rig Tools deformer is forced to “stabilize” the deformation immediately without a smooth transition. Figure 6
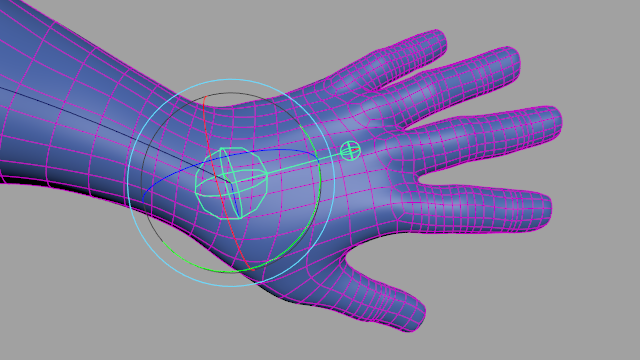
Figure 6
Simple muscles
When rigging characters with a well-defined physique, some kind of muscle-based deformation is often necessary. However, a fully simulated muscle deformation system is frequently overkill for nonphotorealistic characters. Rig Tools can be used to make simple muscle deformation that is very easy to set up.
To create a simple muscle system, add a one-bone joint chain across the area your muscle covers, and constrain the first and last joints of the chain to your character’s existing Rig Tools skeleton using Deform Field constraints. The muscle chain’s first and last joints will follow existing deformation very closely, but stretch and compress the area between them. Figure 7
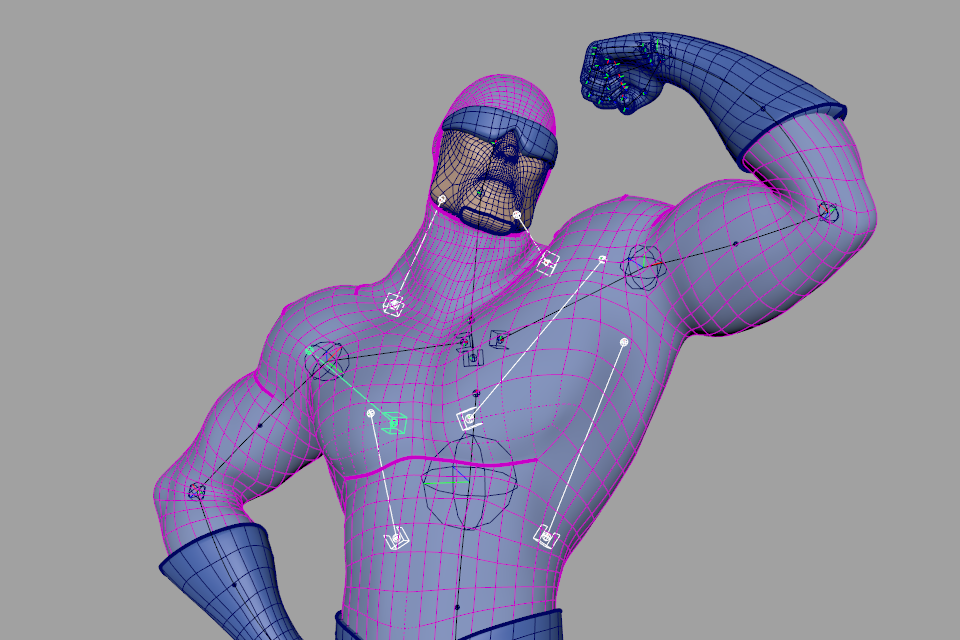
Figure 7
You can then simply paint appropriate areas of the mesh to this muscle chain. Figure 8
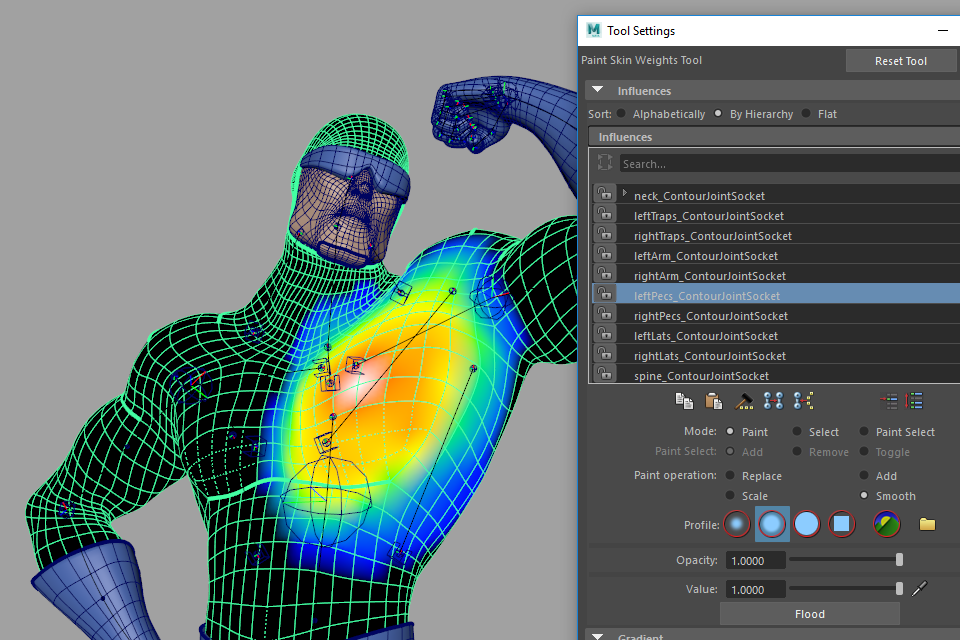
Figure 8
“Broken” or “free” rigging
When animating very cartoony characters, it is often expedient to skip FK/IK blending systems and the complexity that comes with them, and simply have the animator place the character’s limb controls—such as the elbows and knees—directly.
Doing this kind of “broken” rigging using Rig Tools is primarily a matter of using aim handles rather than IK handles for the character’s arms and legs. Other aspects of broken rigging (stretchy limbs, for instance) naturally follow from Rig Tool’s spline-based deformation. Figure 9
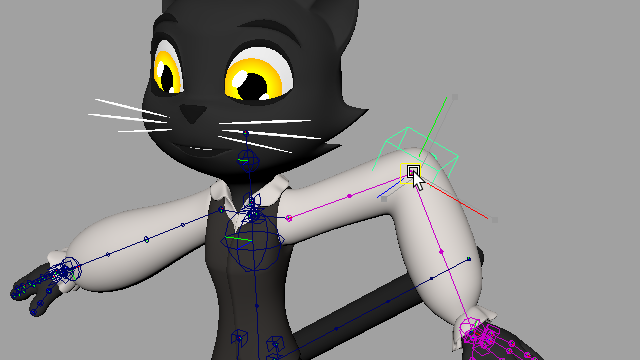
Figure 9
It’s often convenient for rigs like this to have some sort of “stretch meter” that tells the animator when they have stretched the character enough beyond its original dimensions to be off-model. Rig tools splines output their length as an attribute called Arc Length, which can be used to easily calculate how different a spline’s current length is from its bind length.
Transform-only deformation
Because both the deform field and spline constraints pick up all of the twist behavior present on a Rig Tools spline, they’re an excellent way to drive conventional joints and other transforms without introducing complex rig systems to manage multiple influences for twist and bend behavior. This is particularly useful for game engine export. Figure 10
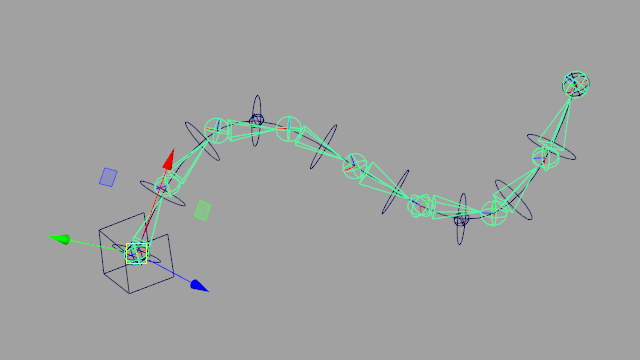
Figure 10