Using Rig Tools With Other Deformers
Deformation order considerations
Rig tools works well with other Maya deformers, but there are some considerations that should be borne in mind. Putting other deformers underneath the Rig Tools deformer will require it to rebind whenever the deformers beneath it change. Binding is computationally expensive in version 1 of Rig Tools—we’d like to imporove its performance in a future release, but doing so is not trivial—and should therefore be avoided when possible. Instead, layer deformers on top of the Rig Tools deformation. Doing so has the additional advantage of allowing other deformers to go onto Maya’s GPU deformer stack—since Rig Tools is not yet a GPU deformer, anything beneath it in the deformer stack will not be executed on the GPU.
Blend Shapes
Blend shapes should be placed on top of the Rig Tools deformer whenever possible, using tangent or transform space blend shapes. See Maya’s documentation on tangent space and transform space blend shapes for more details. Figure 1
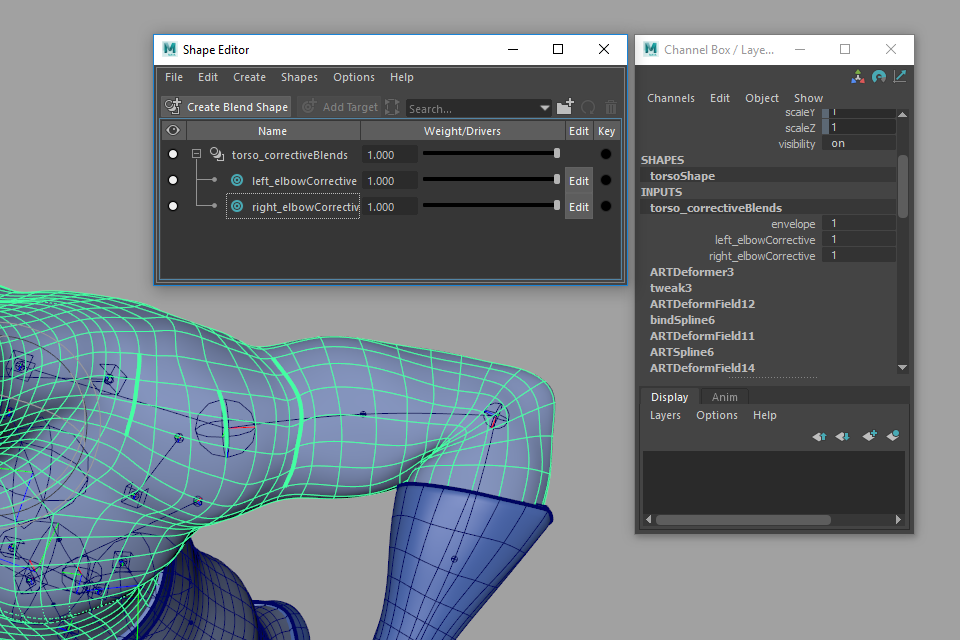
Figure 1
Transform space blend shapes tend to evaluate faster than tangent space blend shapes, and are more reliable, but Maya does not currently offer a tool to mirror them, requiring some custom scripting to use them effectively. Use whichever is most appropriate for your situation.
Layered skin clusters
It is often useful to layer a conventional Maya skin cluster on top of Rig Tools deformation to provide additive tweak controls. Figure 2
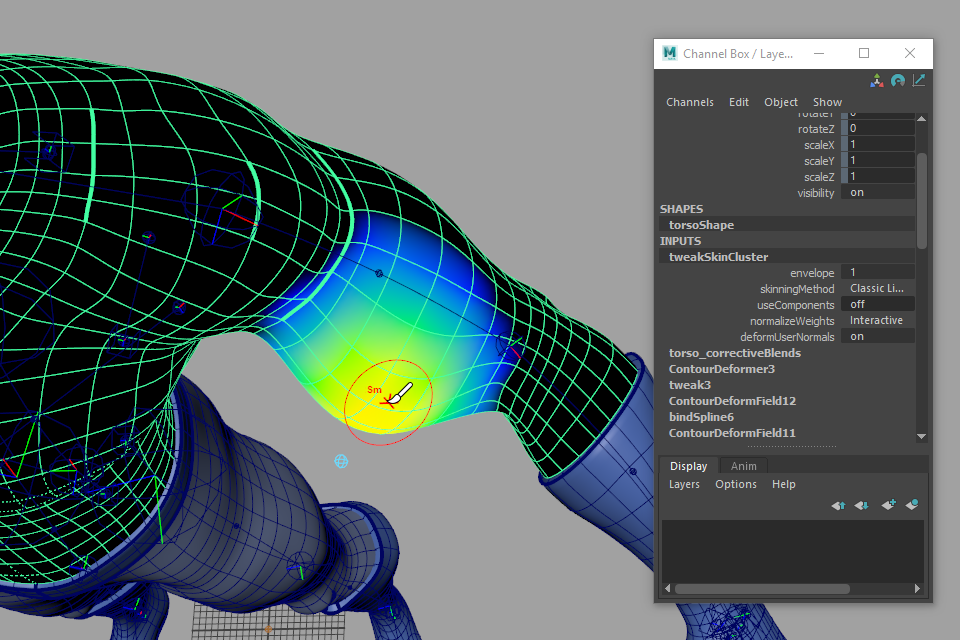
Figure 2
A common way to create tweak controls that ride along with the rig is to buffer a tweak joint, then constrain the buffer to the rig using a Contour Deform Field constraint. The bindPreMatrix attributes of the Maya skin cluster can be driven by the buffer, which allows the joint to move along with the rig without double transformation. Figure 3

Figure 3
Pose Interpolators
Pose Interpolators (also called Pose Space Deformers, or PSDs) are a useful tool for achieving very specific deformation by driving a blend shape only when the the character assumes a specific pose. They are usually driven by the rotation of a transform, such as a joint.
Rig tools bones are splines, and can have bone CVs, so the rotation values of their associated joints do not fully determine their shape. We have included a tool to add spline constrained locators to the Rig Tools spline that can be used to drive a Maya Pose Interpolator correctly. To add these locators to your spline, select a joint and choose Rig Tools ► Tools ► Create Locators to Drive Maya PSD from the menu.
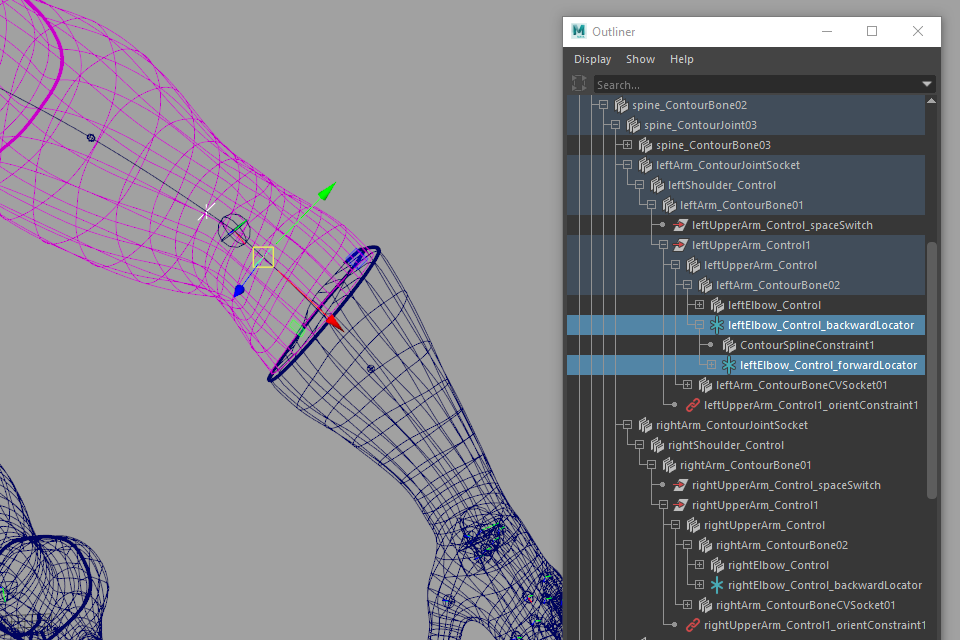
Figure 4
This will create two locators constrained to the spline on either side of the joint. The locator further down the chain (the forward locator) is parented to the one further up the chain (the backward locator), and should be used to drive the Pose Interpolator. The forward locator’s orientation in world space is the frame along the spline at that point along its length. Because it is parented to the backward locator, using the forward locator’s rotation to drive the Pose Interpolator is analogous to using a Maya joint’s rotation to drive a Pose Interpolator in a more conventional rig.

Figure 5
You can also use either the backward or forward locator as the transform for the transform space of a transform-space blend shape.
For more information on setting up Pose Interpolators and driving blend shapes with them, see Maya’s documentation.
Delta Mush Deformation
Delta Mush deformation is an excellent complement to Rig Tools, and is particularly useful for handling areas of relatively constant curvature at the transition between Rig Tools influences.
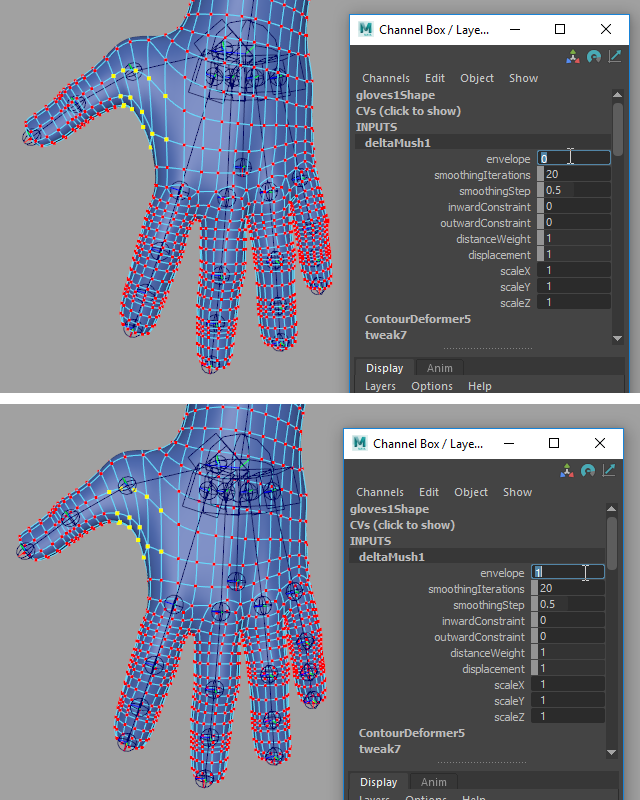
Figure 6
You will usually want to limit Delta Mush to areas where Rig Tools influences overlap. In areas controlled by one spline, Rig tools usually gives better results by itself. To limit the Delta Mush deformation to the appropriate areas you can apply a Delta Mush deformer to the entire mesh and paint away the parts you don’t want it to affect, or apply it just to a set of vertices.
Some examples of cases where Delta Mush is often useful are:
The skin between thumb and palm
The armpit
The side of the neck
The crotch